Adding and Editing Integrations
To work with the API, you need to set up an integration between your wallet and the API. This means making a cryptocurrency wallet available to the API.
Adding a New Integration
-
Log in to admin panel:
- Production: https://app.cleverlee.com
- Testing environment: https://wallet--crypto-demo.d.apicworld.com/
-
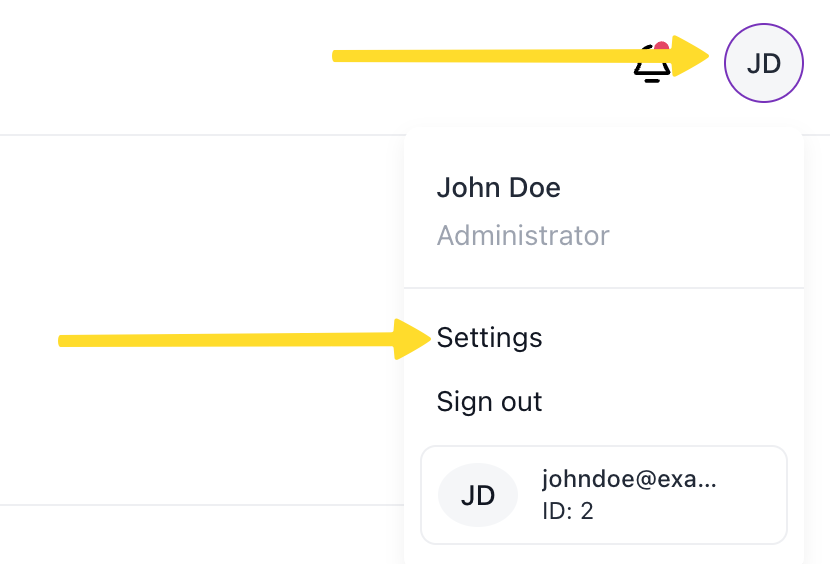
In the top-right corner, click on the round icon and select Settings from the dropdown menu.
-
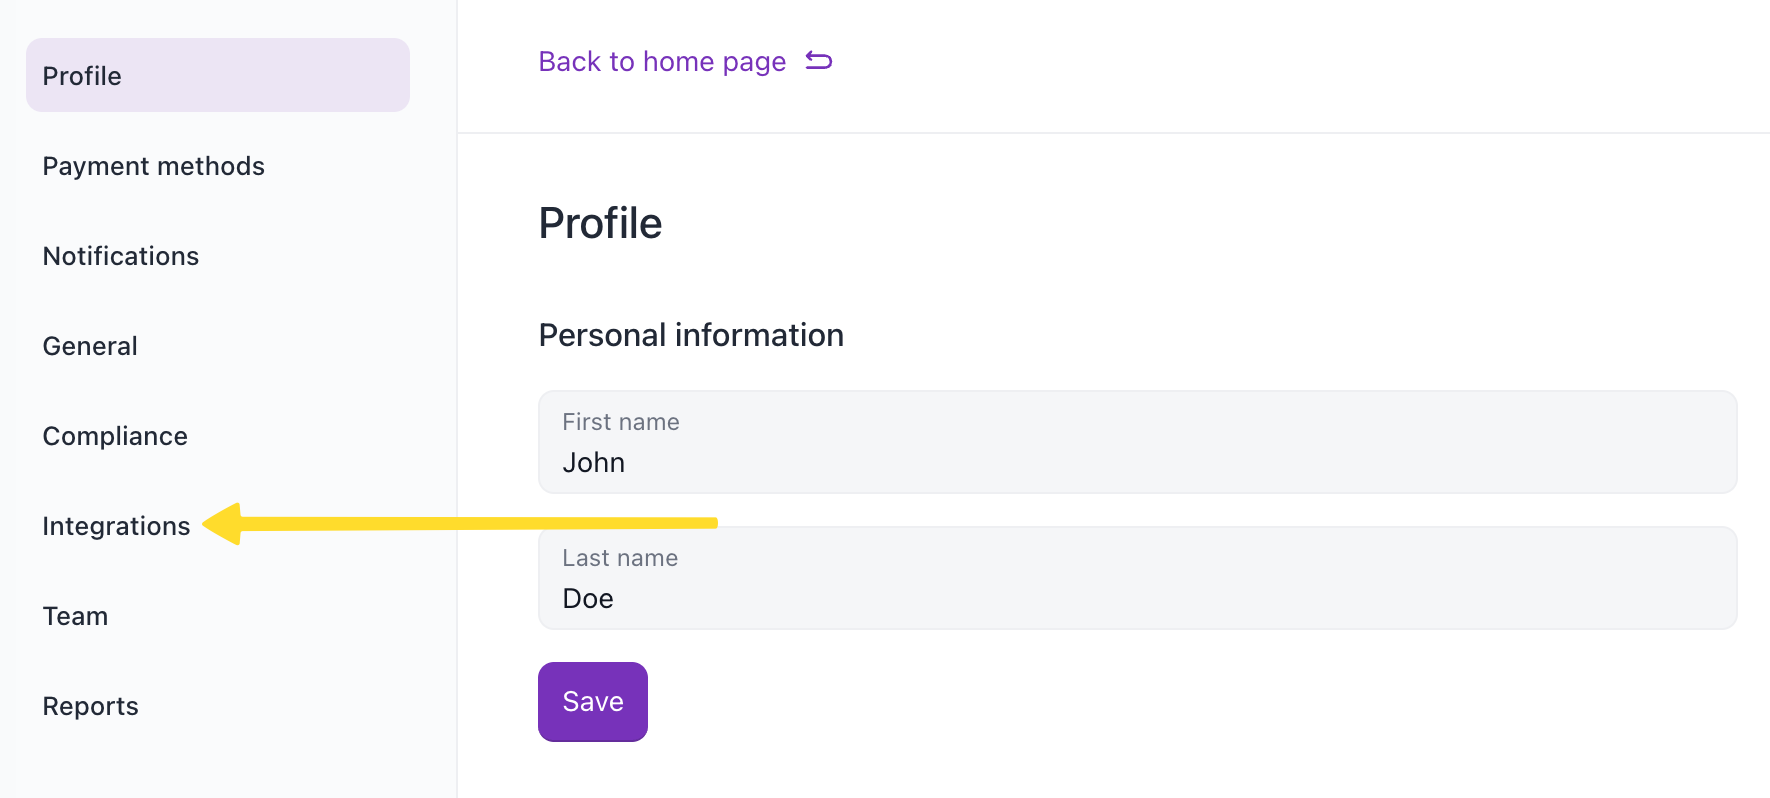
In the left menu, select Integrations.
-
Click the New integration button in the top-right corner.
-
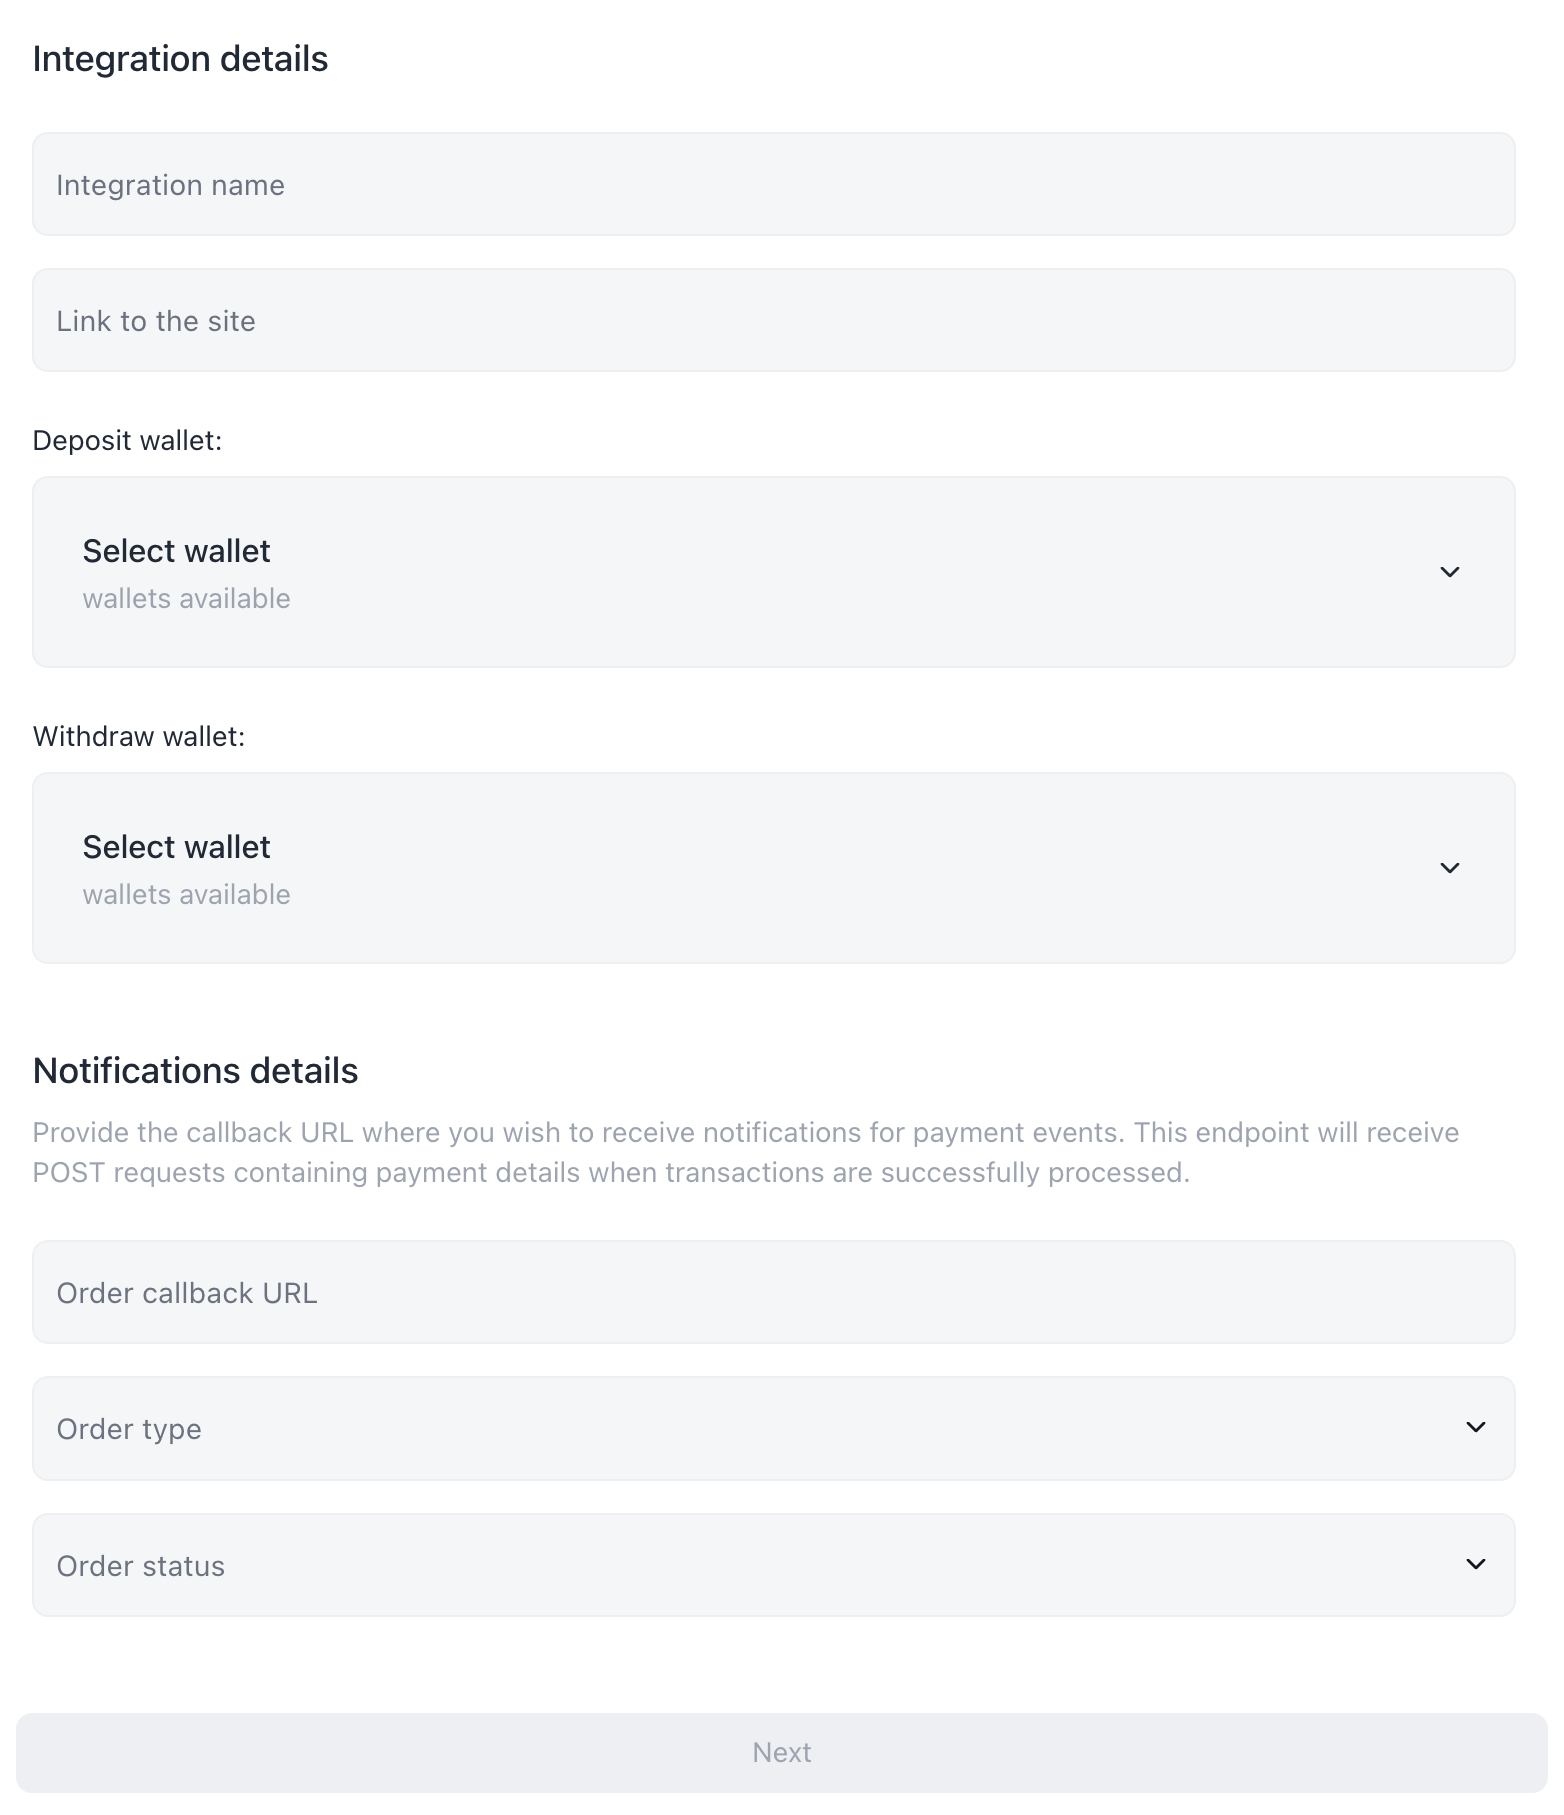
In the popup window, fill out the following fields:
Integration details:
- Integration name - the name of the integration
- Link to the site - a link to your website
- Deposit wallet - the wallet to be used for deposits. This wallet will receive funds when using the Create a payment order and Create a deposit order endpoints.
- Withdraw wallet - the wallet to be used for withdrawals. This wallet will receive funds when using withdrawal endpoints.
Notifications details:
Configure webhook notifications to receive real-time updates about order events. For detailed information about webhooks, see Webhooks.
- Order callback URL - the HTTPS endpoint where you want to receive order event notifications
- Order type - select the type of orders for which you want to receive notifications (e.g., Deposit)
- Order status - select the status that will trigger the webhook (e.g., Completed)
-
Enter the TOTP code generated by Google Authenticator into the text field and click the Verify button.

Disabling an Integration
- Log in to admin panel:
- Production: https://app.cleverlee.com
- Testing environment: https://wallet--crypto-demo.d.apicworld.com/
- In the top-right corner, click on the round icon and select Settings from the dropdown menu.
- In the left menu, select Integrations.
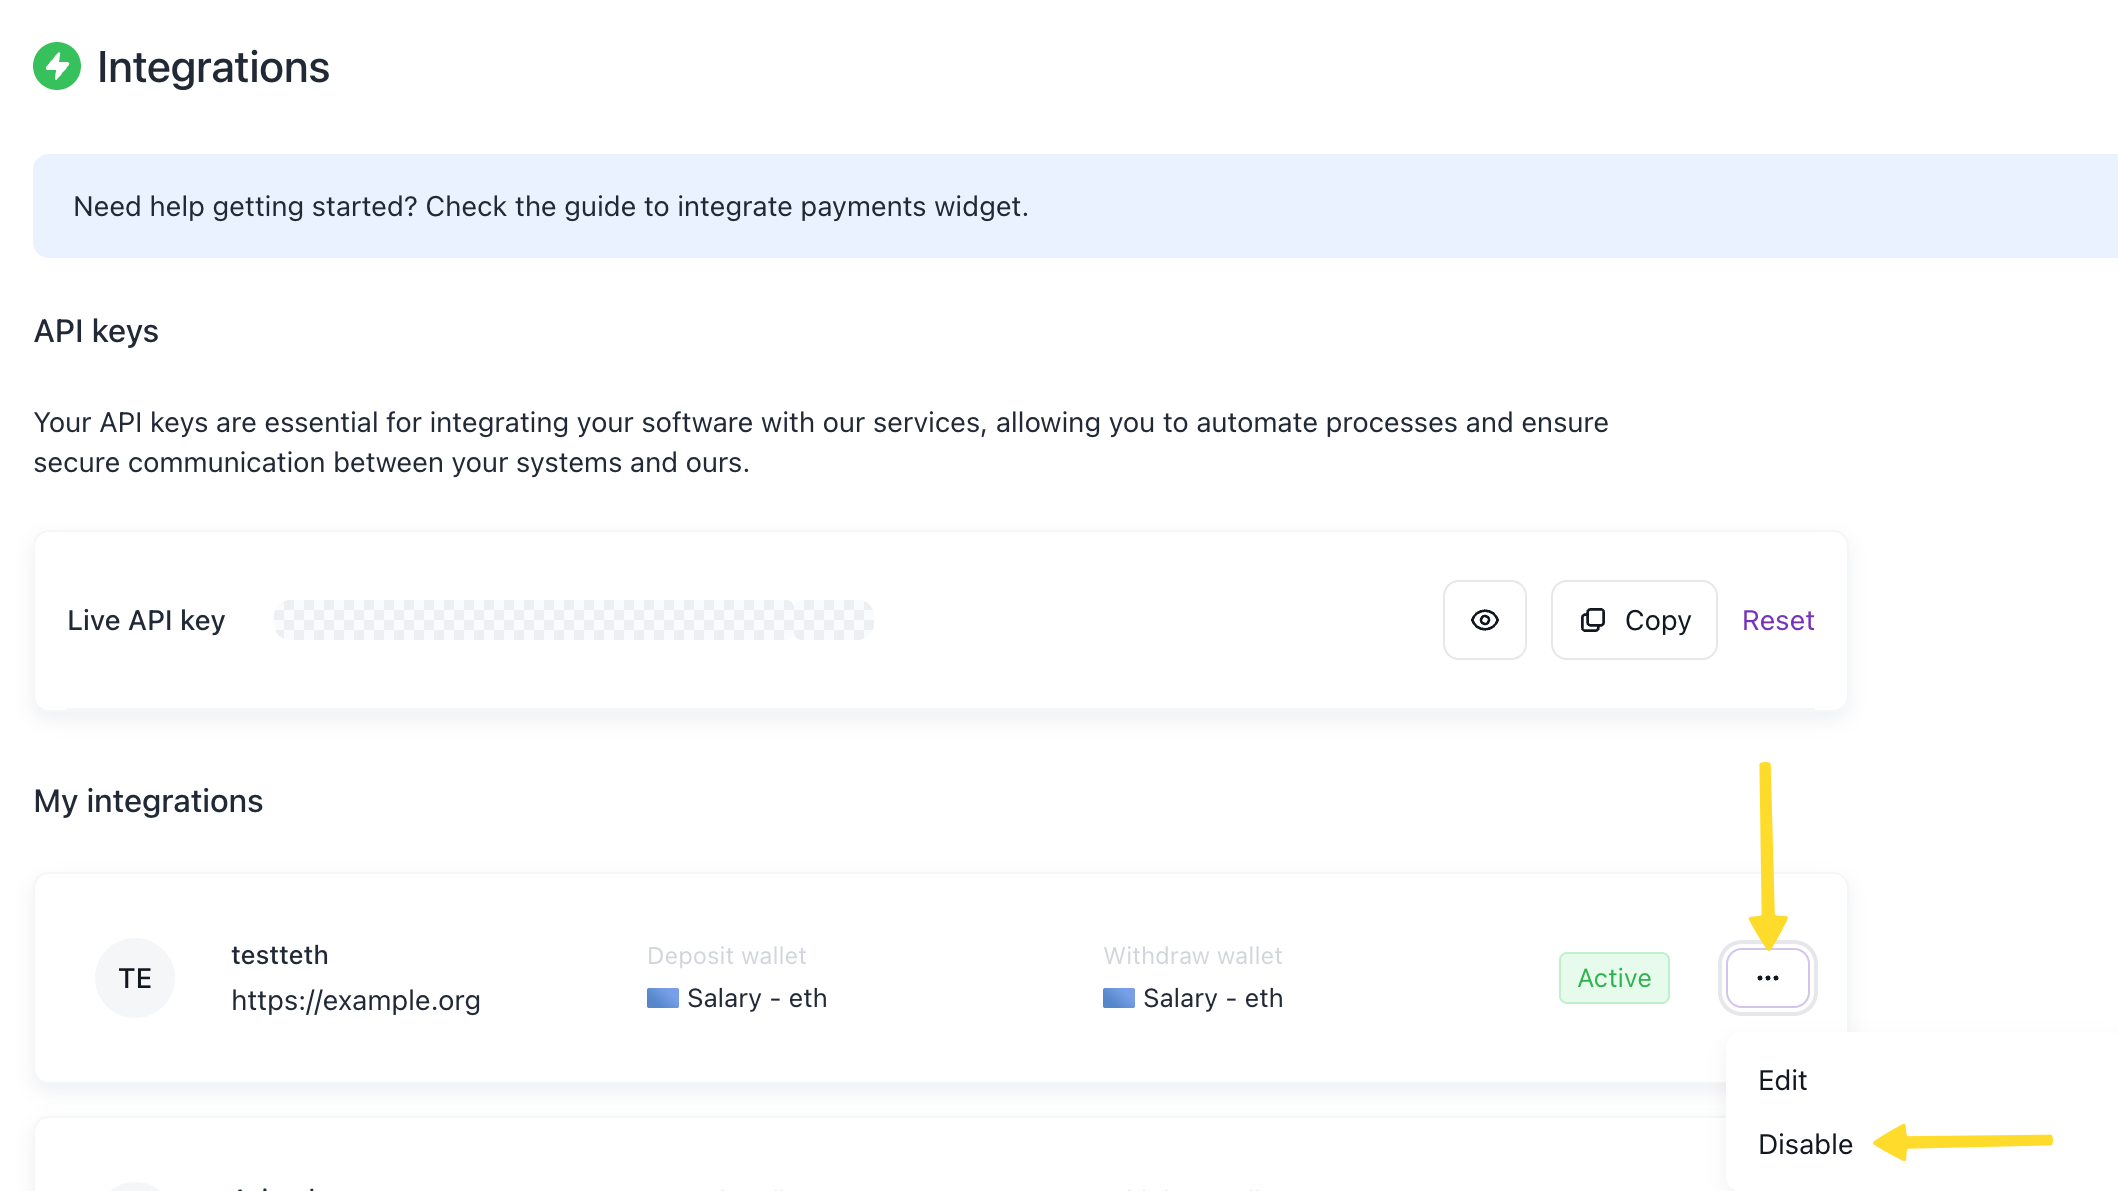
- For the integration you want to disable, click the three dots button and choose Disable from the dropdown menu.
- Enter the TOTP code generated by Google Authenticator into the text field and click the Verify button.
Editing an Integration
-
Log in to admin panel:
- Production: https://app.cleverlee.com
- Testing environment: https://wallet--crypto-demo.d.apicworld.com/
-
In the top-right corner, click on the round icon and select Settings from the dropdown menu.
-
In the left menu, select Integrations.
-
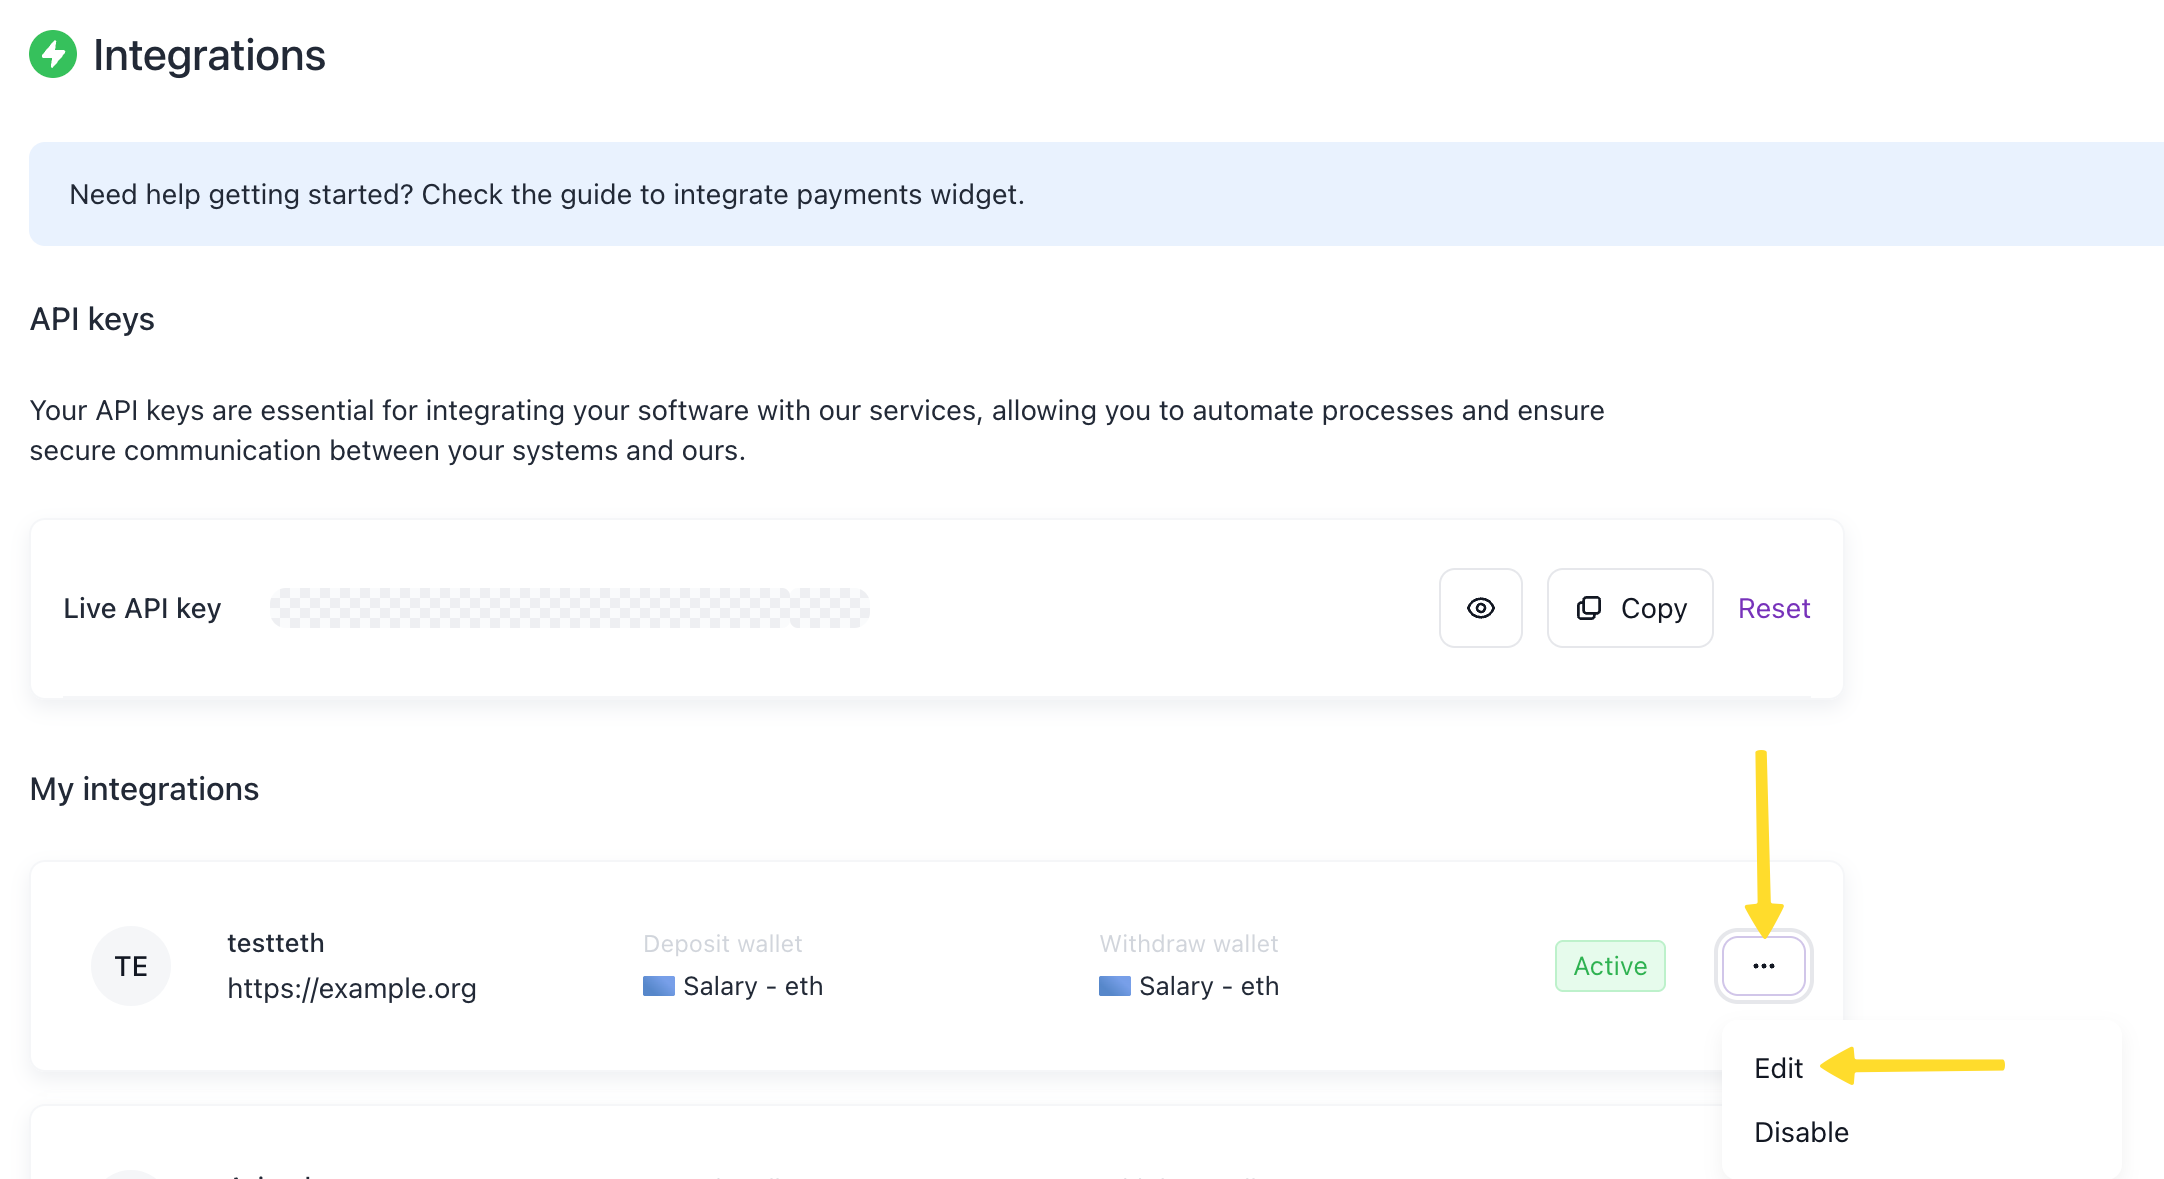
For the integration you want to edit, click the three dots button and choose Edit from the dropdown menu.
-
In the popup window, fill out the following fields:
Integration details:
- Integration name - the name of the integration
- Link to the site - a link to your website
- Deposit wallet - the wallet to be used for deposits. This wallet will receive funds when using the Create a payment order and Create a deposit order endpoints.
- Withdraw wallet - the wallet to be used for withdrawals. This wallet will receive funds when using withdrawal endpoints.
Notifications details:
Configure webhook notifications to receive real-time updates about order events. For detailed information about webhooks, see Webhooks.
- Order callback URL - the HTTPS endpoint where you want to receive order event notifications
- Order type - select the type of orders for which you want to receive notifications (e.g., Deposit)
- Order status - select the status that will trigger the webhook (e.g., Completed)
-
Enter the TOTP code generated by Google Authenticator into the text field and click the Verify button.